I made Pioneer Woman's Cinnamon French toast since I could make it ahead and served with with a rainbow of fruit like the rainbow stuffed french toast. I also copied The Polka Dot umbrella's pot of gold game, which the kids are loving! Then I made pots of gold using my cupcake wrapper cricut cartridge and some rainbow ribbon. I have these pictures posted on our facebook page if you want to see them bigger. And while you're there, feel free to "like" us! (hint, hint, wink, wink)
Showing posts with label St. Patrick's Day. Show all posts
Now we saw all three of these parties featured on Tip Junkie who is the queen of all things fab. So thanks to her for tracking down some candy for the eyes and to each of the party planners themselves all featured with their shots! Let's Party.
The rainbow decor would add such a flirty vibe to any St. Patrick’s Day party.
St. Patrick’s Day Party! {diy decorating}
Seriously, we put the whole thing together in two days flat … via email no less! And it was all super affordable {Target, Walgreen’s, and the local food store}! Quick, easy, inexpensive, and gorgeous … who doesn’t love a party with that description?
The printables can be purchased, but they’re a bit expensive. I thought it was worth a mention as the party is just gorgeous.
Darling Rainbow Party
If you’re looking for a fun twist on the St. Patrick’s Day party and are looking for a more variety of colors than green, then check out this darling rainbow party.The rainbow decor would add such a flirty vibe to any St. Patrick’s Day party.
Created by: Not Just a Mommy
t. Patrick’s Day Party Dessert Bar {diy decor}
St. Patrick’s Day Party Dessert Bar {diy decor}
I adore this green candy bar! It’s decorated with green M&M’s, lolli pops, cupcakes, mints, taffy, and candy sticks. Completely darling!Created by: Anders Ruff Custom Designs
St. Patricks Day Party! {diy decorating}
St. Patrick’s Day Party! {diy decorating}
Seriously, we put the whole thing together in two days flat … via email no less! And it was all super affordable {Target, Walgreen’s, and the local food store}! Quick, easy, inexpensive, and gorgeous … who doesn’t love a party with that description?
The printables can be purchased, but they’re a bit expensive. I thought it was worth a mention as the party is just gorgeous.
Created by: TSJ Photography
I found this fun coloring page on Tip Junkie
Happy St. Patrick’s Day Coloring Page {printable}
There are so many things you can do with this darling Happy St. Patrick’s day coloring sheet:- Coloring Activity
- Enlarge the clip art for Pin the Hat on the Leprechaun
- After it’s colored – cut it up into a puzzle {laminate – optional}
- Put questions behind the puzzle pieces to answer about the Legend of Saint Patrick.
Created by: Projects for Preschoolers
Or at least pretending to be Irish for a day!
Neither Dot or Glitta is super Irish, although there's some bloodlines floating around in there and Glitta has an Irish Grandma, so the St. Patrick's Day menu isn't really traditionally Irish most years.
This year, we're just doing green colored foods and a legend-inspired treat.
For the entree, we're thinking a homemade pesto sauce with farfalle and grilled chicken.
If you haven't made pesto before, it's sooooo easy, and Dot LOVES it.
Ingredients:
About 2 c. of basil
handful of parsley (just to make it extra green)
About 3/4 c. shredded Romano cheese (or Parmesan)
About 2/3 c. of olive oil
handful of pine nuts
3 or 4 cloves of garlic, minced
salt and pepper to taste
Also will need for dish:
1 lb. farfalle
grilled chicken
arugula
feta
chopped tomatoes
Add basil, parsley and pine nuts to a blender or food processor and pulse a few times. Then start adding oil in a drizzle while blending, using about 1/2 of the oil (just until it's mixing well). Then add cheese and garlic and blend with more oil. Salt and pepper to taste. Serve fresh over cooked farfalle (a little pesto goes a long way) with grilled chicken. I'll toss in a handful of arugula, some chopped tomatoes and feta with the pasta.
This Snap Peas with Pancetta is one of my new faves! And because it is green we are including it in our St. Patty's Day Menu. Barefoot Contessa is always a winner for me and you really must try this salad it is so delish.
Snap Peas with Pancetta
adapted by There's Always Thyme to Cook
1 tablespoon salt
1 pound sugar peas, trimmed
1/4 pound pancetta, diced
1/2 cup olive oil
2 tablespoons freshly squeezed lemon juice
2 tablespoons white wine vinegar
1/4 cup minced red onion
5 tablespoons freshly grated Pecorino Romano cheese
salt and freshly ground black pepper
My notes -- Instead of blanching you can also steam the snap peas in the microwave on high power for about 6 minutes, then drain in a colander and immerse in ice water. I also served it warm, so I heated it again in the microwave for about 2 minutes before I added the vinaigrette and bacon. If you make the peas in advance and reheat, it loses it's bright green color but still tastes delicious!
Our next side dish comes via Martha from this month's Living magazine, its Herbed Garlic Bread. It looks yummy and heaven knows we need more garlic and carbs another side dish in this meal!
Ingredients
Serves 4
- 3/4 cup fresh flat-leaf parsley, coarsely chopped
- 1 garlic clove
- 1 stick unsalted butter, room temperature
- Coarse salt and freshly ground pepper
- 1 loaf ciabatta bread, cut in half horizontally
Directions
- Preheat oven to 350 degrees. Finely chop parsley and garlic in a food processor. Add butter, 1/2 teaspoon salt, and 1/4 teaspoon pepper, and puree until smooth.
- Spread herbed butter on cut sides of bread, then place cut sides back together. Wrap in foil. Bake until bread is warm and butter melts, about 15 minutes. Cut into wedges.
![]() |
| image via The Next Kid thing, apparently originally Family Fun |
Now for a true taste of the Irish tradition (well maybe just a taste of one of Glitta's family's favorite frozen salad recipes). Since this is a recipe that has been passed down over the year's it does not come with a pretty little picture. But don't let that stop you from trying this tasty little bite.
Frozen Mint Salad serves 16
1 29 oz can crushed pineapple, drain 1/2 of juice
1 3 oz package lime jello
1/2 bag mini marshmellows
1 C yellow box soft buttermints, crushed
1 carton of cool whip
Combine first 4 ing in a bowl. Stir and put in refrigerator until marshmellows dissolve. Fold in cool whip. Add a couple of drops of mint extract and green food coloring and stir well. Spoon into lined muffin tins. Place in freezer for several hours or overnight. Makes 16.
And now a dessert (preferably a few hours after that quite large dinner) of Mint Chocolate Chip Milk Shakes!
You can't even taste the spinach and I'm feeling pretty sure that
this will be one of the only food items Dot's kids will willingly touch!
Now, you might not make all these recipes, (we might not make all these recipes, and we call ourselves the Holiday Snobs!) but at least throw some green food coloring in the milk for a bowl of cereal and have some fun!
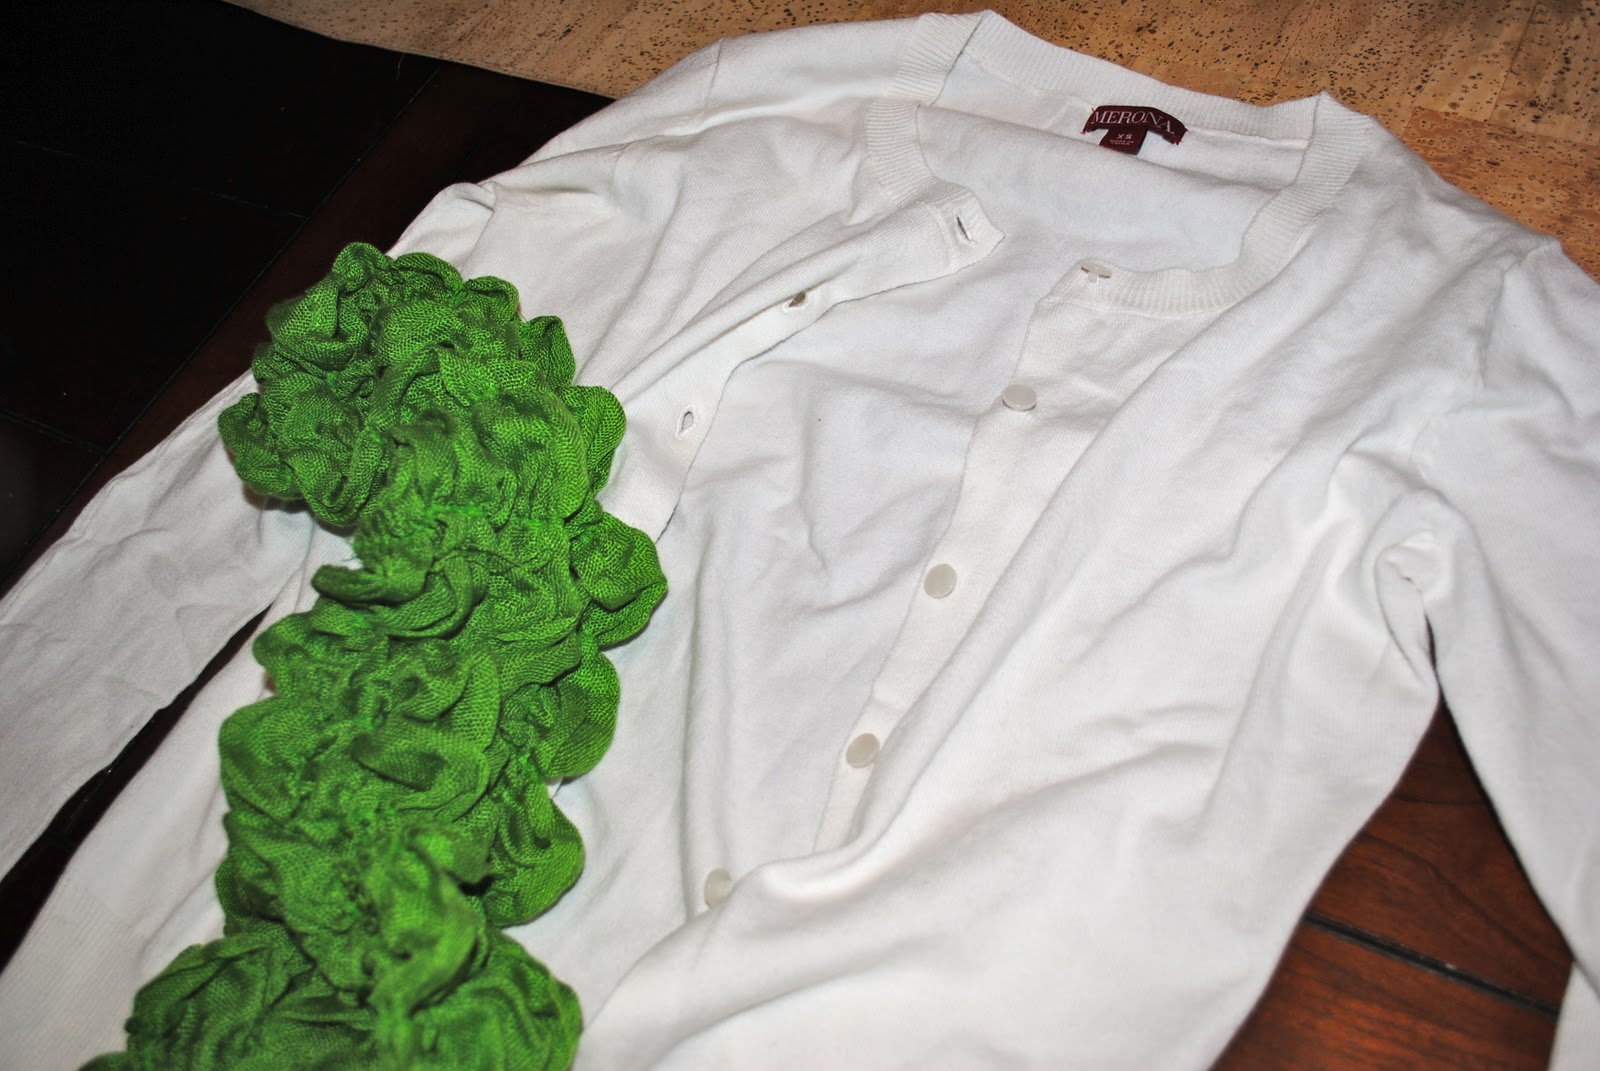
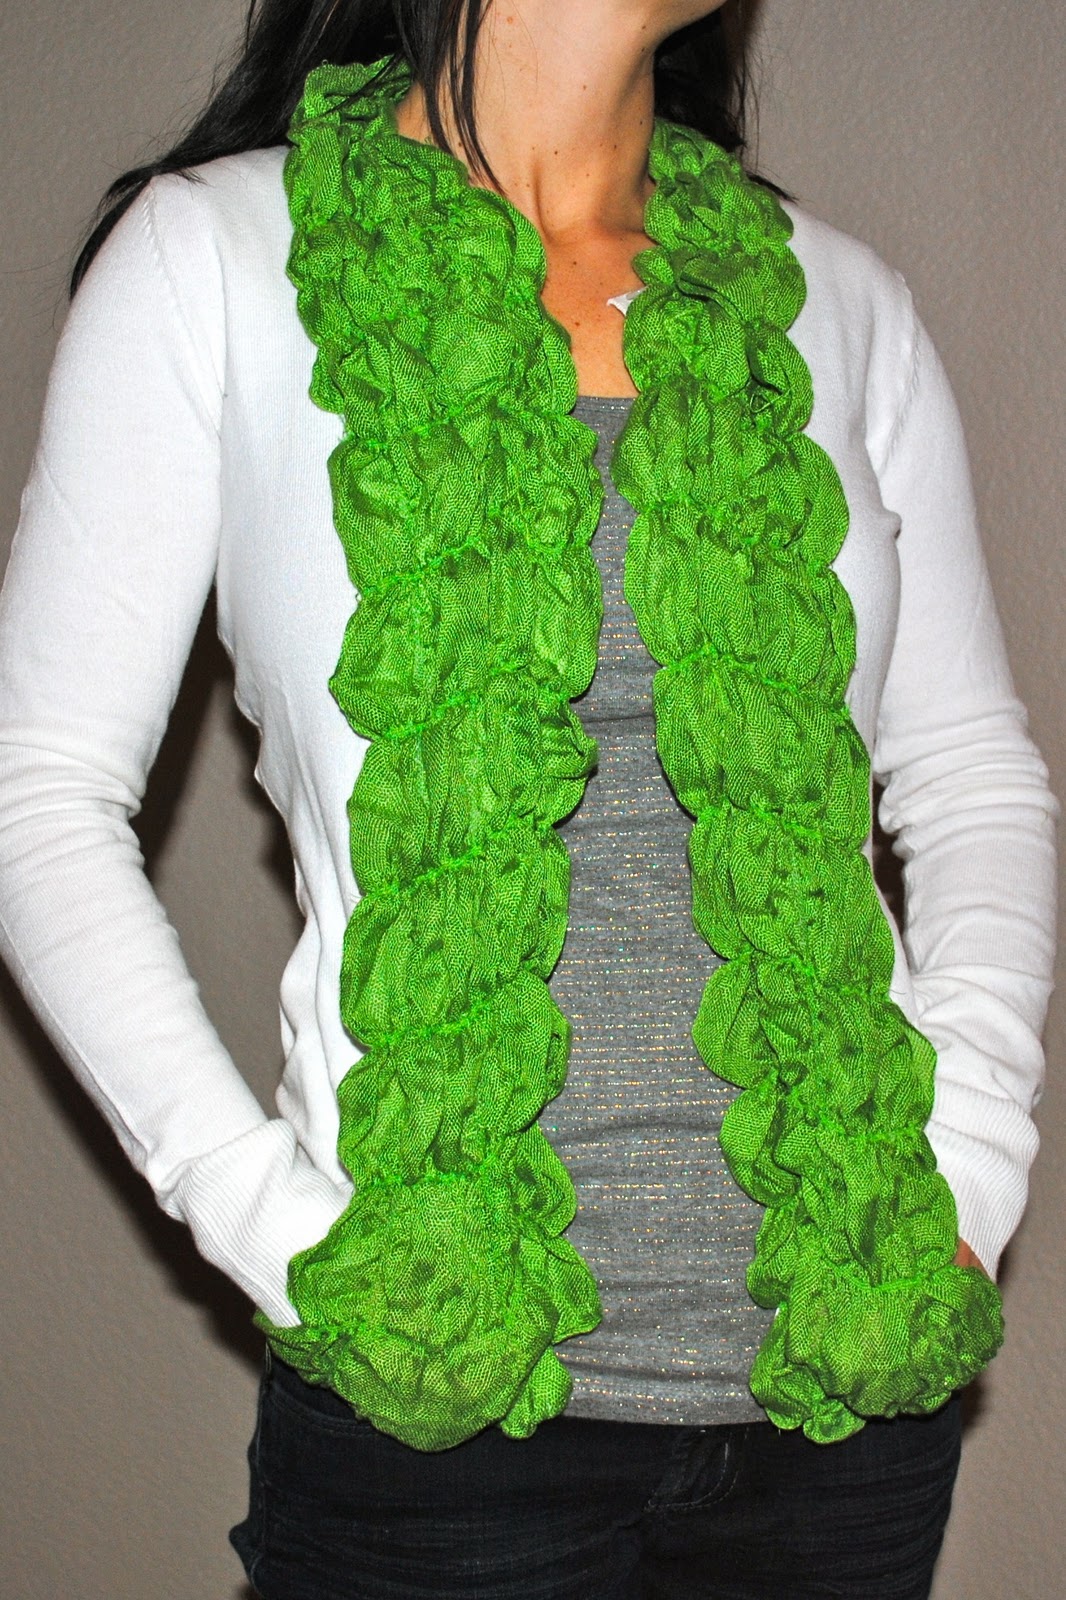
I saw this post by Jen at Tatertots and Jello and thought the sweater/scarf refashion was so cute and right up my alley. So when I was at Target (like I seem to be every single day of my life) and breezed through their dollar section, I saw a ruffly green scarf and LIGHTBULB!
And although Jen used an old cardigan she already had, I still liked my white one at home. So I hit up the clearance rack and voila, Target pulled through for me with a clearanced white cardigan in my size for 5 bucks. Doesn't get much better than that!
although I should admit it was in the "$2.50" section of the dollar section
And all it took was a quick zip around the edges with the sewing machine (one straight line with green thread) and I had a:
St. Patrick's Sweater Refashion!
I have to say sometimes my high hopes for making the perfect handmade treat for all the important people in my life gets derailed by all THE important people in my life...or actually was it my lack of planning or the last minute trip to the mall or the headache that was brought on by those little important ones fighting all afternoon...(hmmm let me think on that) either way I was feeling a little overwhelmed because even though high hopes derailed, I still can't let a holiday pass without handing out some sort of holiday treat!! What to do, what to do. Then, like a "little" green angel was guiding me, I was in line to pay at Bath and Body and I looked down and saw these most perfect St. Patrick's Day treats!!!!
Wait for it.....
Can you believe how perfect!! I was saved by the Bath and Body St Patrick's Day fairy--and they are on sale for 5 For $5--someone please pinch me. Then to make it even more perfect, (because when you find something so Fab you must share immediately so I passed this hot little tip on) Dot had to go and make this darling little tag:
So, now I have my holiday treat, no handmade sweat this year, but it still shows all the green love!! Go ahead and download your tag and then make a run to your Bath and Body and show those important someone's in your life and little green love. (By the way, the tag size looks best printed in a wallet size in proportion to those cute little handbacs!)
Wait for it.....
Can you believe how perfect!! I was saved by the Bath and Body St Patrick's Day fairy--and they are on sale for 5 For $5--someone please pinch me. Then to make it even more perfect, (because when you find something so Fab you must share immediately so I passed this hot little tip on) Dot had to go and make this darling little tag:
So, now I have my holiday treat, no handmade sweat this year, but it still shows all the green love!! Go ahead and download your tag and then make a run to your Bath and Body and show those important someone's in your life and little green love. (By the way, the tag size looks best printed in a wallet size in proportion to those cute little handbacs!)
We love an outfit or accessory as much (or more!) as the next person, but the kiddo's reactions to the holiday are pretty fun! Here's some fun ideas to try:
The Polka Dot Umbrella has this hiding game (with instructions on her site) that I know will keep my little ones entertained for hours:
Lets Explore (once again, found via Tip Junkie) has this downloadable book to print off and make with your little ones!
Tip Junkie also has this idea for a St. Patty's themed Memory Game...
The Polka Dot Umbrella has this hiding game (with instructions on her site) that I know will keep my little ones entertained for hours:
Family Fun has some very cute coloring sheets and puzzles that will buy you some quiet time...
Green Lily sells a pdf to make this Leprechaun Treasure Hunt:
![]() |
| found via Tip Junkie's St. Patrick's Day site- which is kinda invaluable to me considering the nature of this blog... |
Lets Explore (once again, found via Tip Junkie) has this downloadable book to print off and make with your little ones!
Which I am making a far simpler version of with just colors since my oldest is a whopping 4 years old:
I know, I know your 4 year old is reading, my mothering skills are more like making the holidays fun...
I cut paint paper into rectangles, cardstock into larger rectangles to layer beneath, and had L paint two of each in one color for a Rainbow Memory Game!
So I had mentioned before that my girls were a little snobbish when it comes time for their holiday shirts!! I have made up their St. Patrick's Day shirt for this year with a little tutorial for you. I went with the rainbow theme that I am loving up and I also a tiny copy of a crewcuts shirt I saw at the outlets. The one at the outlets was on a grey tee with cream tulle bows around the neck--so darling. It got me thinking...what about a rainbow around the neck with a glam sham underneath? Let' see what you think!
I bought 1/4 yd of tulle in the rainbow colors--WAY more than you will need for 1 or even 10 shirts-- and then you will cut the tulle into 1 1/2 x 7 inch strips and tie them into little bows.
Place the little bows across the top of the tee as shown, making sure to place a piece of foil underneath, then you will just hot glue each bow to shirt. (I hot glue tulle to shirts all the time. It can be washed, inside out on the gentle cycle with cold water and hang dry).
Sorry for the BAD picture I am new at this!! But to make your glamsham you will need to trace a shamrock shape onto felt, have a roll of green sequins (mine are from Hobby Lobby for $1 on sale), and I used Aleene's Super Fabric glue. You just put the glue all over the felt and layer the sequin in a line to cover the whole shamrock.
Here is what the shirt looked like after it was completed!! I think it will be just perfect for warding off pinches!
Enjoy
I was linked up here:
I bought 1/4 yd of tulle in the rainbow colors--WAY more than you will need for 1 or even 10 shirts-- and then you will cut the tulle into 1 1/2 x 7 inch strips and tie them into little bows.
Place the little bows across the top of the tee as shown, making sure to place a piece of foil underneath, then you will just hot glue each bow to shirt. (I hot glue tulle to shirts all the time. It can be washed, inside out on the gentle cycle with cold water and hang dry).
Sorry for the BAD picture I am new at this!! But to make your glamsham you will need to trace a shamrock shape onto felt, have a roll of green sequins (mine are from Hobby Lobby for $1 on sale), and I used Aleene's Super Fabric glue. You just put the glue all over the felt and layer the sequin in a line to cover the whole shamrock.
Here is what the shirt looked like after it was completed!! I think it will be just perfect for warding off pinches!
Enjoy
I was linked up here:
Erin Dollar on Etsy has inspired many a crafter (judging by my google images search) to make these felt rainbow circle garlands. I saw a tutorial on someone's blog and I can't remember where!
Then I sorted them as redorangeyellowgreenbluepurple line-up, and started just doing a straight stitch across them all!
I feel so bad!
But I decided to copy it myself, but with what I had: paper and a circle punch! I just went through all my paper scraps to find a rainbow's worth and started punching and sorting.
Then I sorted them as redorangeyellowgreenbluepurple line-up, and started just doing a straight stitch across them all!
I double looped one over my mantle,
And then draped one over my cute St. Patty's subway art
Probably took me all of 30 minutes! Try it, you'll like it! I even had enough to give some to Glitta!
We have a little banner tutorial for you today! It's St. Patrick's Day themed, but it's about the things that make you feel "lucky!"
I cut eight pieces of fabric since I wanted 4 double-sided panels that could hold a 4x6 photo

We've linked up today with: Today's Creative blog
We've linked up with Tip Junkie
I cut eight pieces of fabric since I wanted 4 double-sided panels that could hold a 4x6 photo
Sew around three edges, cut the edges off the corners and then flip to right sides out
1. Use one clear page protector, 2. Slice off a tiny edge where it folds, 3. Measure 6.5"and cut, 4. Turn and measure 4.5" and cut, 5. You will then have 4 4.5x6.5 clear sheets. 6. Sew one sheet onto each fabric panel, around 3 sides, so you can slip a photo inside
Glue this embellishment to the top right of the third panel
Glue the embellishment into the top right corner of the third panel.
I feel pretty lucky to have this family!
But you can be "lucky" too! I have one extra fabric banner (twine and lace not included) to give to one of you! Become a follower of this blog and leave a comment telling us you did, WITH YOUR EMAIL ADDRESS and you will be entered to win!!!! Contest closes Thursday, March 10, 2011 at midnight!
I'm linking here:We've linked up today with: Today's Creative blog
We've linked up with Tip Junkie